
 Canada - EN
 Canada - FR
 United States
How to Install Modu-Loc Fence
July 4, 2018Sometimes, you don’t need turnkey service from your suppliers. There are times when all you need is the product they supply. While we are well-known for offering full-service fence rentals, we have many customers who simply require us to drop off fence and then pick it up when they’re done with it.
If you need fence in a relatively simple configuration (such as a small compound or a straightforward perimeter), you might consider having it dropped off so that you can install it on your own. Setting up the fence yourself can certainly save you some money on labour costs.
Here’s the thing: our Fence Guys make it look easy! If you’ve never installed temporary fence before, you may be in for some back-breaking trial and error. Our fence panels are heavy, and there is a bit of a science to proper fence installation.
To help you take more of a “DIY” approach to temporary rental fence, we’ve put together a step-by-step installation guide for Modu-Loc fence. Follow these steps to ensure your fence is installed safely and correctly. You’ll find these steps in a handy take-away PDF version at the bottom of this post.
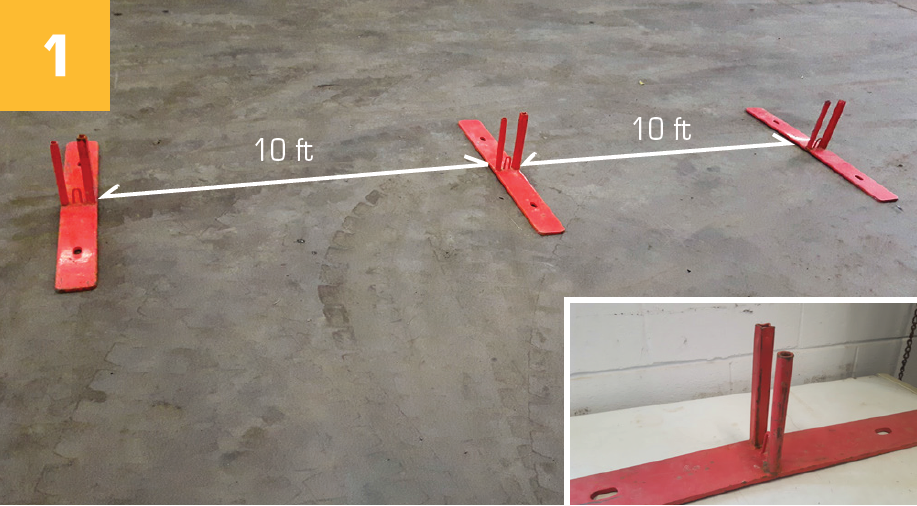
Step 1 – Lay the Bases
All Modu-Loc fence bases consist of one square peg and one round peg. Lay out your fence bases approximately 10 feet apart with all of the round pegs facing the direction in which you will build your fence.
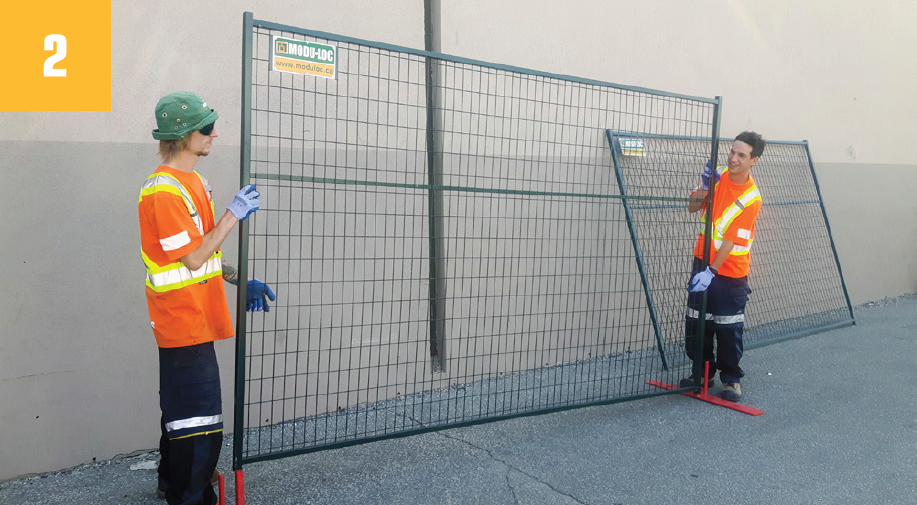
Step 2 – Install the Panels
With a partner, begin assembling the fence panels onto the bases. Lift one end of the panel and insert the square peg into the post of the panel first, then drag the panel back to the previous base and place it on the round peg. Make sure to install the fence with the Modu-Loc label plate on top and the horizontal bar facing into the site. The horizontal bar should face into the site to avoid providing a foothold to would-be intruders.
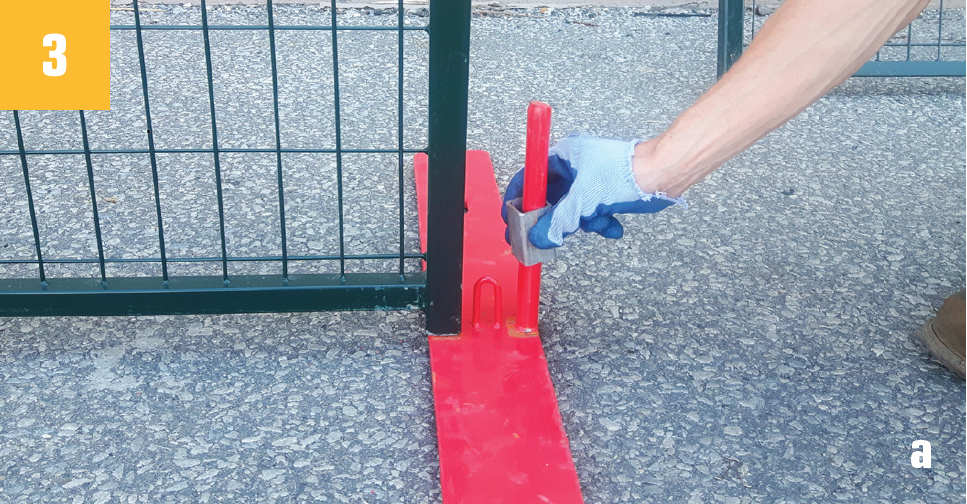
Step 3 – Install Any Gates
You can install gates anywhere in the fence line. Gates swing on the round peg. When installing a gate, place one spacer over the round peg (a) before placing the panel onto the base (b). This will elevate the panel and allow the gate to swing.
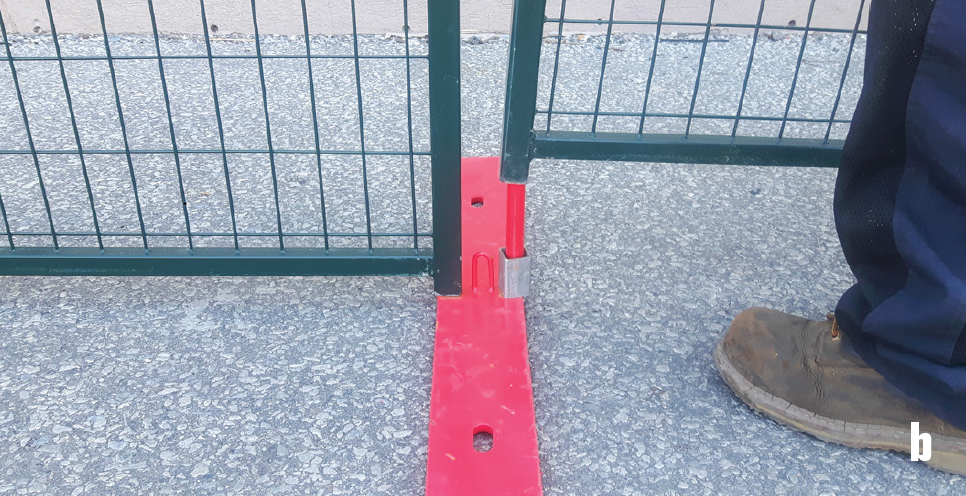
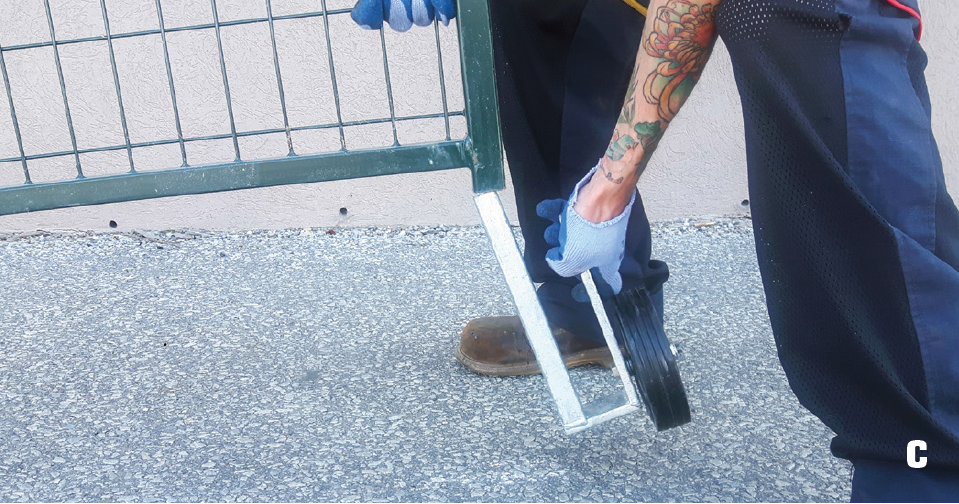
Install the gate wheel at the opposite end of the panel (c). With the spacer and wheel installed, the gate will be level and swing freely.
Step 4 – Install the Caps and/or U-Bolts
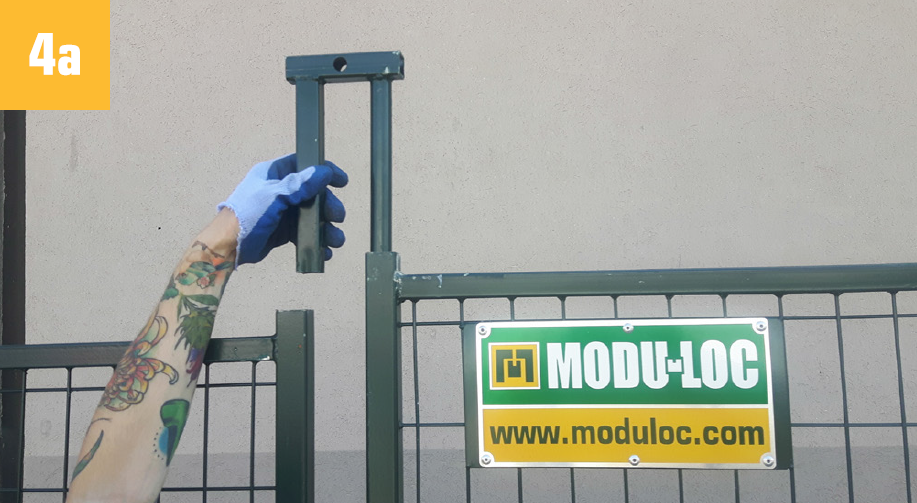
IF USING CAPS: Now you’re ready to finalize the fence set-up by installing the caps. Like the bases, all of the caps also consist of one square and one round peg. These need to be installed in the same fashion that the bases were laid out: round pegs line up with round pegs and square with square. Insert the cap into the top of the panel, and slide the cap in completely.
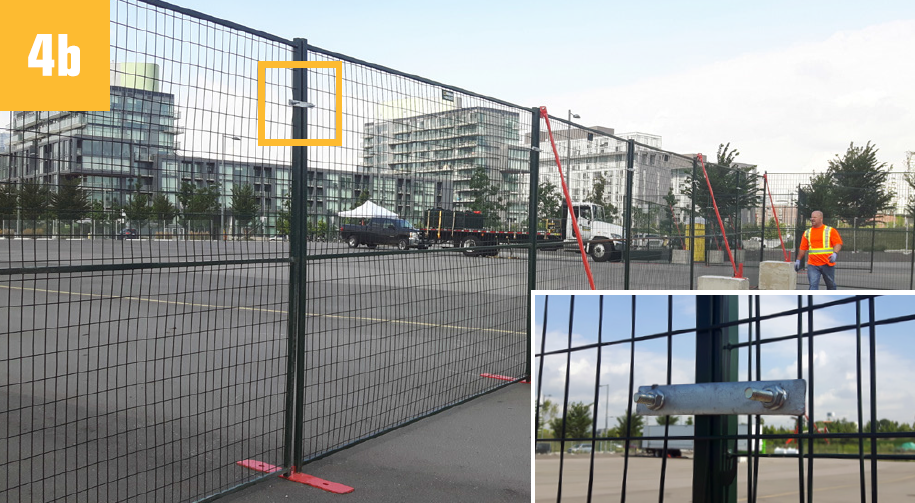
IF USING U-BOLTS: Now you’re ready to finalize the fence set-up by installing the u-bolts. Install the u-bolts at approximately 6 feet high, connecting two panels. The bolts should be securely fastened and face into the site. We do this deliberately to prevent would-be intruders from removing the bolts and gaining access to the site.
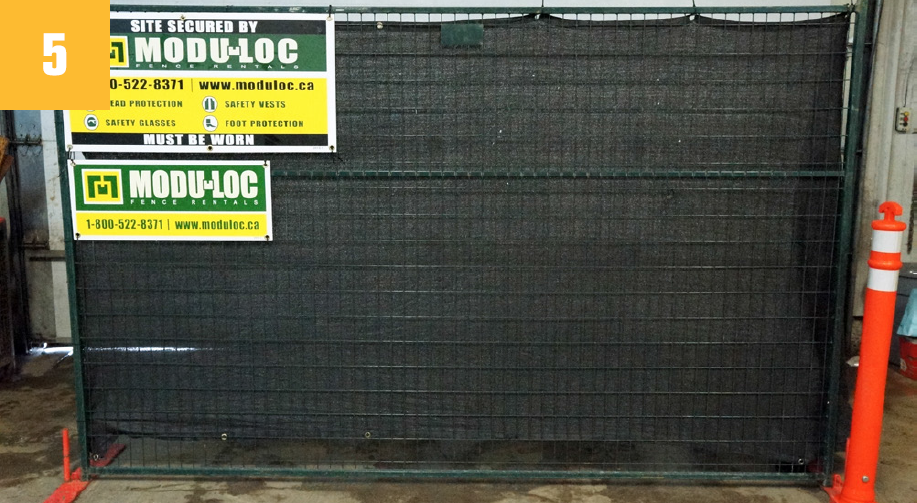
Step 5 – Add Accessories and/or Signage
Place your signage, delineators, safety ramps, or screen on the fence. Please note that fence lines with scrim or signage can become a hazard if not properly secured or stabilized, so we strongly encourage the use of stability accessories. We urge you to contact your local sales representative for additional stability solutions if you plan to hang anything from the fence panels.
Now that you’re armed with step-by-step installation instructions, you’re ready to set up your Modu-Loc fence! Click the button below to download the above steps in a one-page printable format, which includes additional tips for best practices.
![]()
For more best practices, check out our Best Practices for Installing Modu-Loc Fence post. It includes additional tips to ensure your temporary fence system is as safe and stable as possible.
Reconsidering handling the install by yourself? Feel free to contact us for a quote for full-service temporary fence rental, including delivery, installation, and removal.
Blog Topics
Follow us


Need help selecting the right product?
We have a number of different fencing options to choose from. The right choice for you may not be obvious. That's okay – our product recommendation tool can help. Simply answer a few quick questions and we can point you in the right direction.
Product Recommendation Tool
Related Posts
Remote Work Tools for Construction Professionals
June 17, 2020The construction industry is notorious for being slow to adopt new technologies. But certain circumstances can accelerate adoption of new ideas out of necessity. This pandemic is one of those situations. Thanks to government-imposed social distancing rules and business shutdowns, many of us are now working remotely. We have altered our daily routines, from the […]

How Events are Pivoting to Survive the Pandemic
June 10, 2020It’s hard to imagine an industry more affected by the pandemic than tourism. Travel restrictions forced countless flight cancellations, hotels and restaurants sit empty, and large-scale gatherings have been banned everywhere. As a supplier of temporary fence for the events industry, we are experiencing the impact second-hand. Modu-Loc is surviving the pandemic in large part […]
Sliding Gate Installation Guide
May 26, 2020When configuring your temporary fence, it’s important to think about all aspects of how it will function. Your Modu-Loc fence is intended for site security and containment. But does this mean it will be difficult for your workers to access your site? Not necessarily! Modu-Loc fence systems include specific components to create pedestrian and vehicle […]
We’re here to answer any questions you may have.